# Flink实时处理Socket数据
在 2.3 中讲解了 Flink 最简单的 WordCount 程序的创建、运行结果查看和代码分析,这篇文章继续带大家来看一个入门上手的程序:Flink 处理 Socket 数据。
# IDEA 创建项目
使用 IDEA 创建新的 module,结构如下:
├── pom.xml
└── src
├── main
│ ├── java
│ │ └── com
│ │ └── zhisheng
│ │ └── socket
│ │ └── Main.java
│ └── resources
│ └── log4j.properties
└── test
└── java
项目创建好了后,我们下一步开始编写 Flink Socket Job 的代码。
# Flink Socket 应用程序代码
Main 类 :
public class Main {
    public static void main(String[] args) throws Exception {
        //参数检查
        if (args.length != 2) {
            System.err.println("USAGE:\nSocketTextStreamWordCount <hostname> <port>");
            return;
        }
        String hostname = args[0];
        Integer port = Integer.parseInt(args[1]);
        final StreamExecutionEnvironment env = StreamExecutionEnvironment.getExecutionEnvironment();
        //获取数据
        DataStreamSource<String> stream = env.socketTextStream(hostname, port);
        //计数
        SingleOutputStreamOperator<Tuple2<String, Integer>> sum = stream.flatMap(new LineSplitter())
                .keyBy(0)
                .sum(1);
        sum.print();
        env.execute("Java WordCount from SocketText");
    }

    public static final class LineSplitter implements FlatMapFunction<String, Tuple2<String, Integer>> {
        @Override
        public void flatMap(String s, Collector<Tuple2<String, Integer>> collector) {
            String[] tokens = s.toLowerCase().split("\\W+");

            for (String token: tokens) {
                if (token.length() > 0) {
                    collector.collect(new Tuple2<String, Integer>(token, 1));
                }
            }
        }
    }
}
pom.xml 添加 build:
<build>
    <plugins>
        <plugin>
            <groupId>org.apache.maven.plugins</groupId>
            <artifactId>maven-compiler-plugin</artifactId>
            <version>3.1</version>
            <configuration>
                <source>${java.version}</source>
                <target>${java.version}</target>
            </configuration>
        </plugin>

        <plugin>
            <groupId>org.apache.maven.plugins</groupId>
            <artifactId>maven-shade-plugin</artifactId>
            <version>3.0.0</version>
            <executions>
                <execution>
                    <phase>package</phase>
                    <goals>
                        <goal>shade</goal>
                    </goals>
                    <configuration>
                        <artifactSet>
                            <excludes>
                                <exclude>org.apache.flink:force-shading</exclude>
                                <exclude>com.google.code.findbugs:jsr305</exclude>
                                <exclude>org.slf4j:*</exclude>
                                <exclude>log4j:*</exclude>
                            </excludes>
                        </artifactSet>
                        <filters>
                            <filter>
                                <artifact>*:*</artifact>
                                <excludes>
                                    <exclude>META-INF/*.SF</exclude>
                                    <exclude>META-INF/*.DSA</exclude>
                                    <exclude>META-INF/*.RSA</exclude>
                                </excludes>
                            </filter>
                        </filters>
                        <transformers>
                            <transformer implementation="org.apache.maven.plugins.shade.resource.ManifestResourceTransformer">
                                <!--注意:这里一定要换成你自己的 Job main 方法的启动类-->
                                <mainClass>com.zhisheng.socket.Main</mainClass>
                            </transformer>
                        </transformers>
                    </configuration>
                </execution>
            </executions>
        </plugin>
    </plugins>
</build>
# Flink Socket 应用程序运行
# 本地 IDE 运行
我们先在终端开启监听 9000 端口:
nc -l 9000
 然后右键运行 Main 类的 main 方法 (注意:需要传入运行参数
 127.0.0.1 9000):
 运行结果如下图:
 我在终端一个个输入下面的字符串:
hello
zhisheng
hello
hello
zhisheng
zhisheng
This is zhisheng‘s book
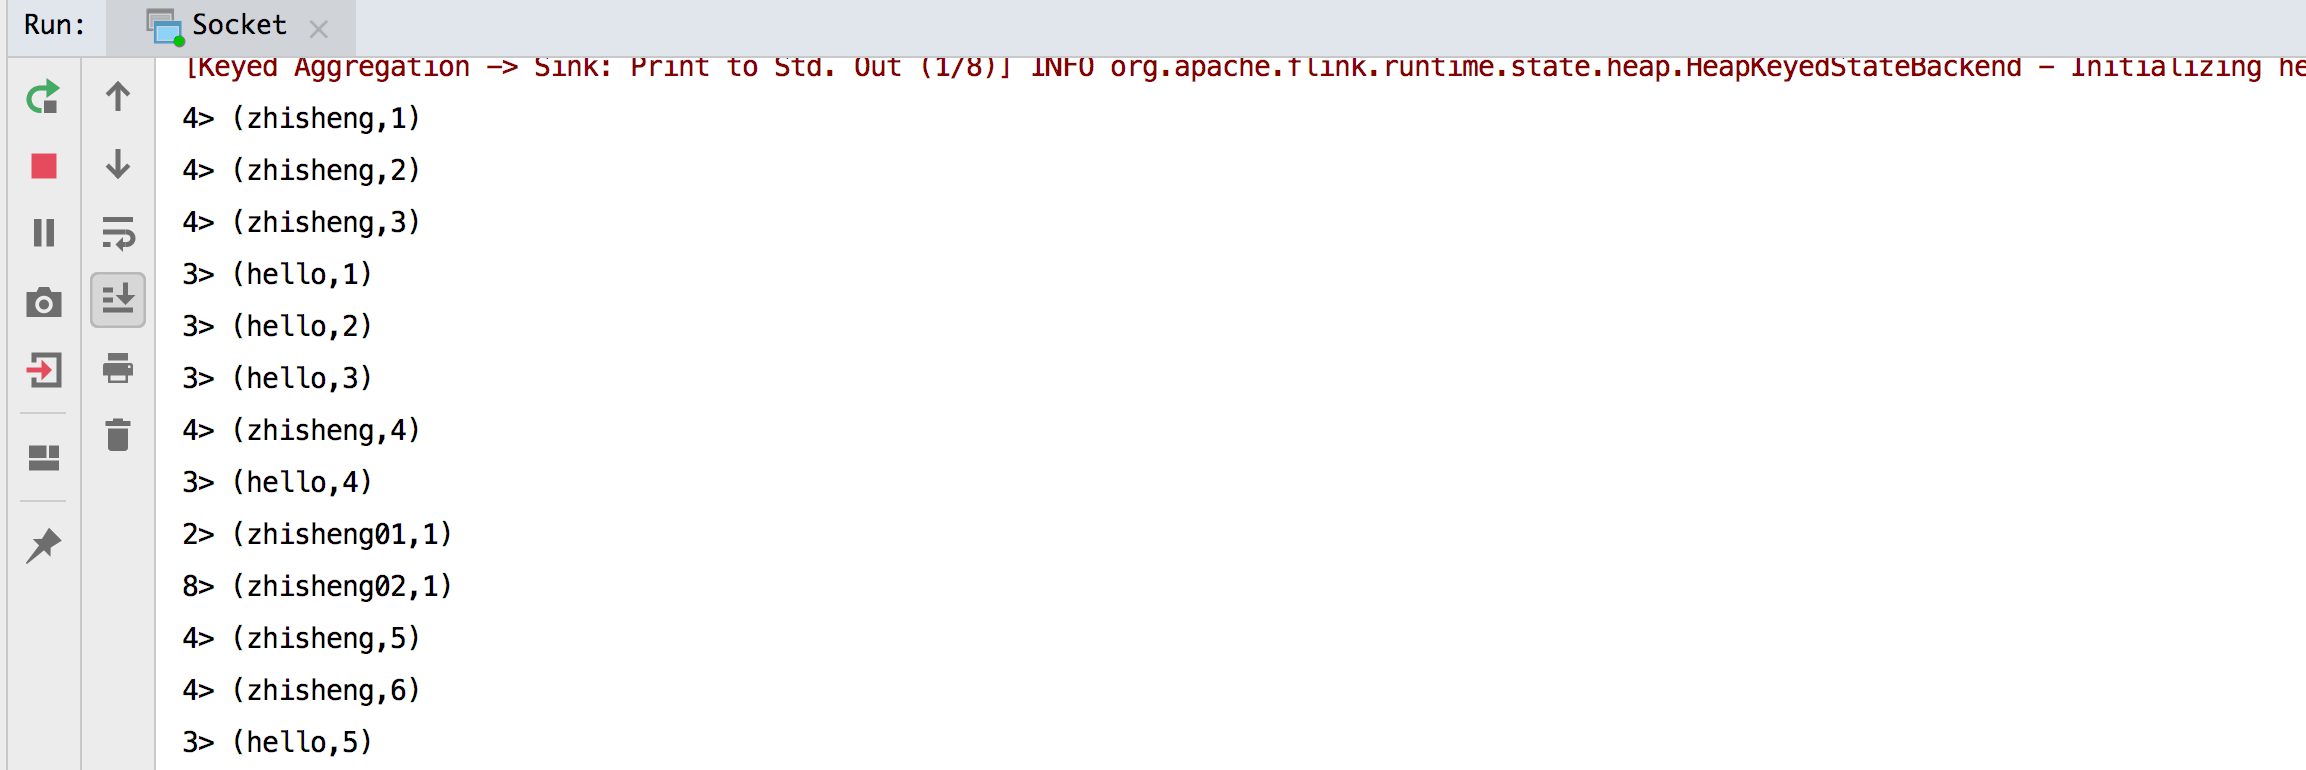
然后在 IDEA 的运行结果会一个个输出来:
2> (hello,1)
2> (zhisheng,1)
2> (hello,2)
2> (hello,3)
2> (zhisheng,2)
2> (zhisheng,3)
3> (s,1)
1> (this,1)
4> (is,1)
2> (zhisheng,4)
3> (book,1)
在本地 IDEA 中运行没有问题,我们接下来使用命令 mvn clean package 打包成一个 Jar (flink-learning-
examples-1.0-SNAPSHOT.jar) 然后将其上传到 Flink UI 上运行一下看下效果。
# UI 运行 Job
依旧和上面那样开启监听本地端口 9200,然后在 http://localhost:8081/#/submit 页面上传 flink-learning-
examples-1.0-SNAPSHOT.jar 后,接着在 Main Class 填写运行的主函数,Program Arguments 填写参数
127.0.0.1 9000,最后点击 Submit 后就可以运行了。
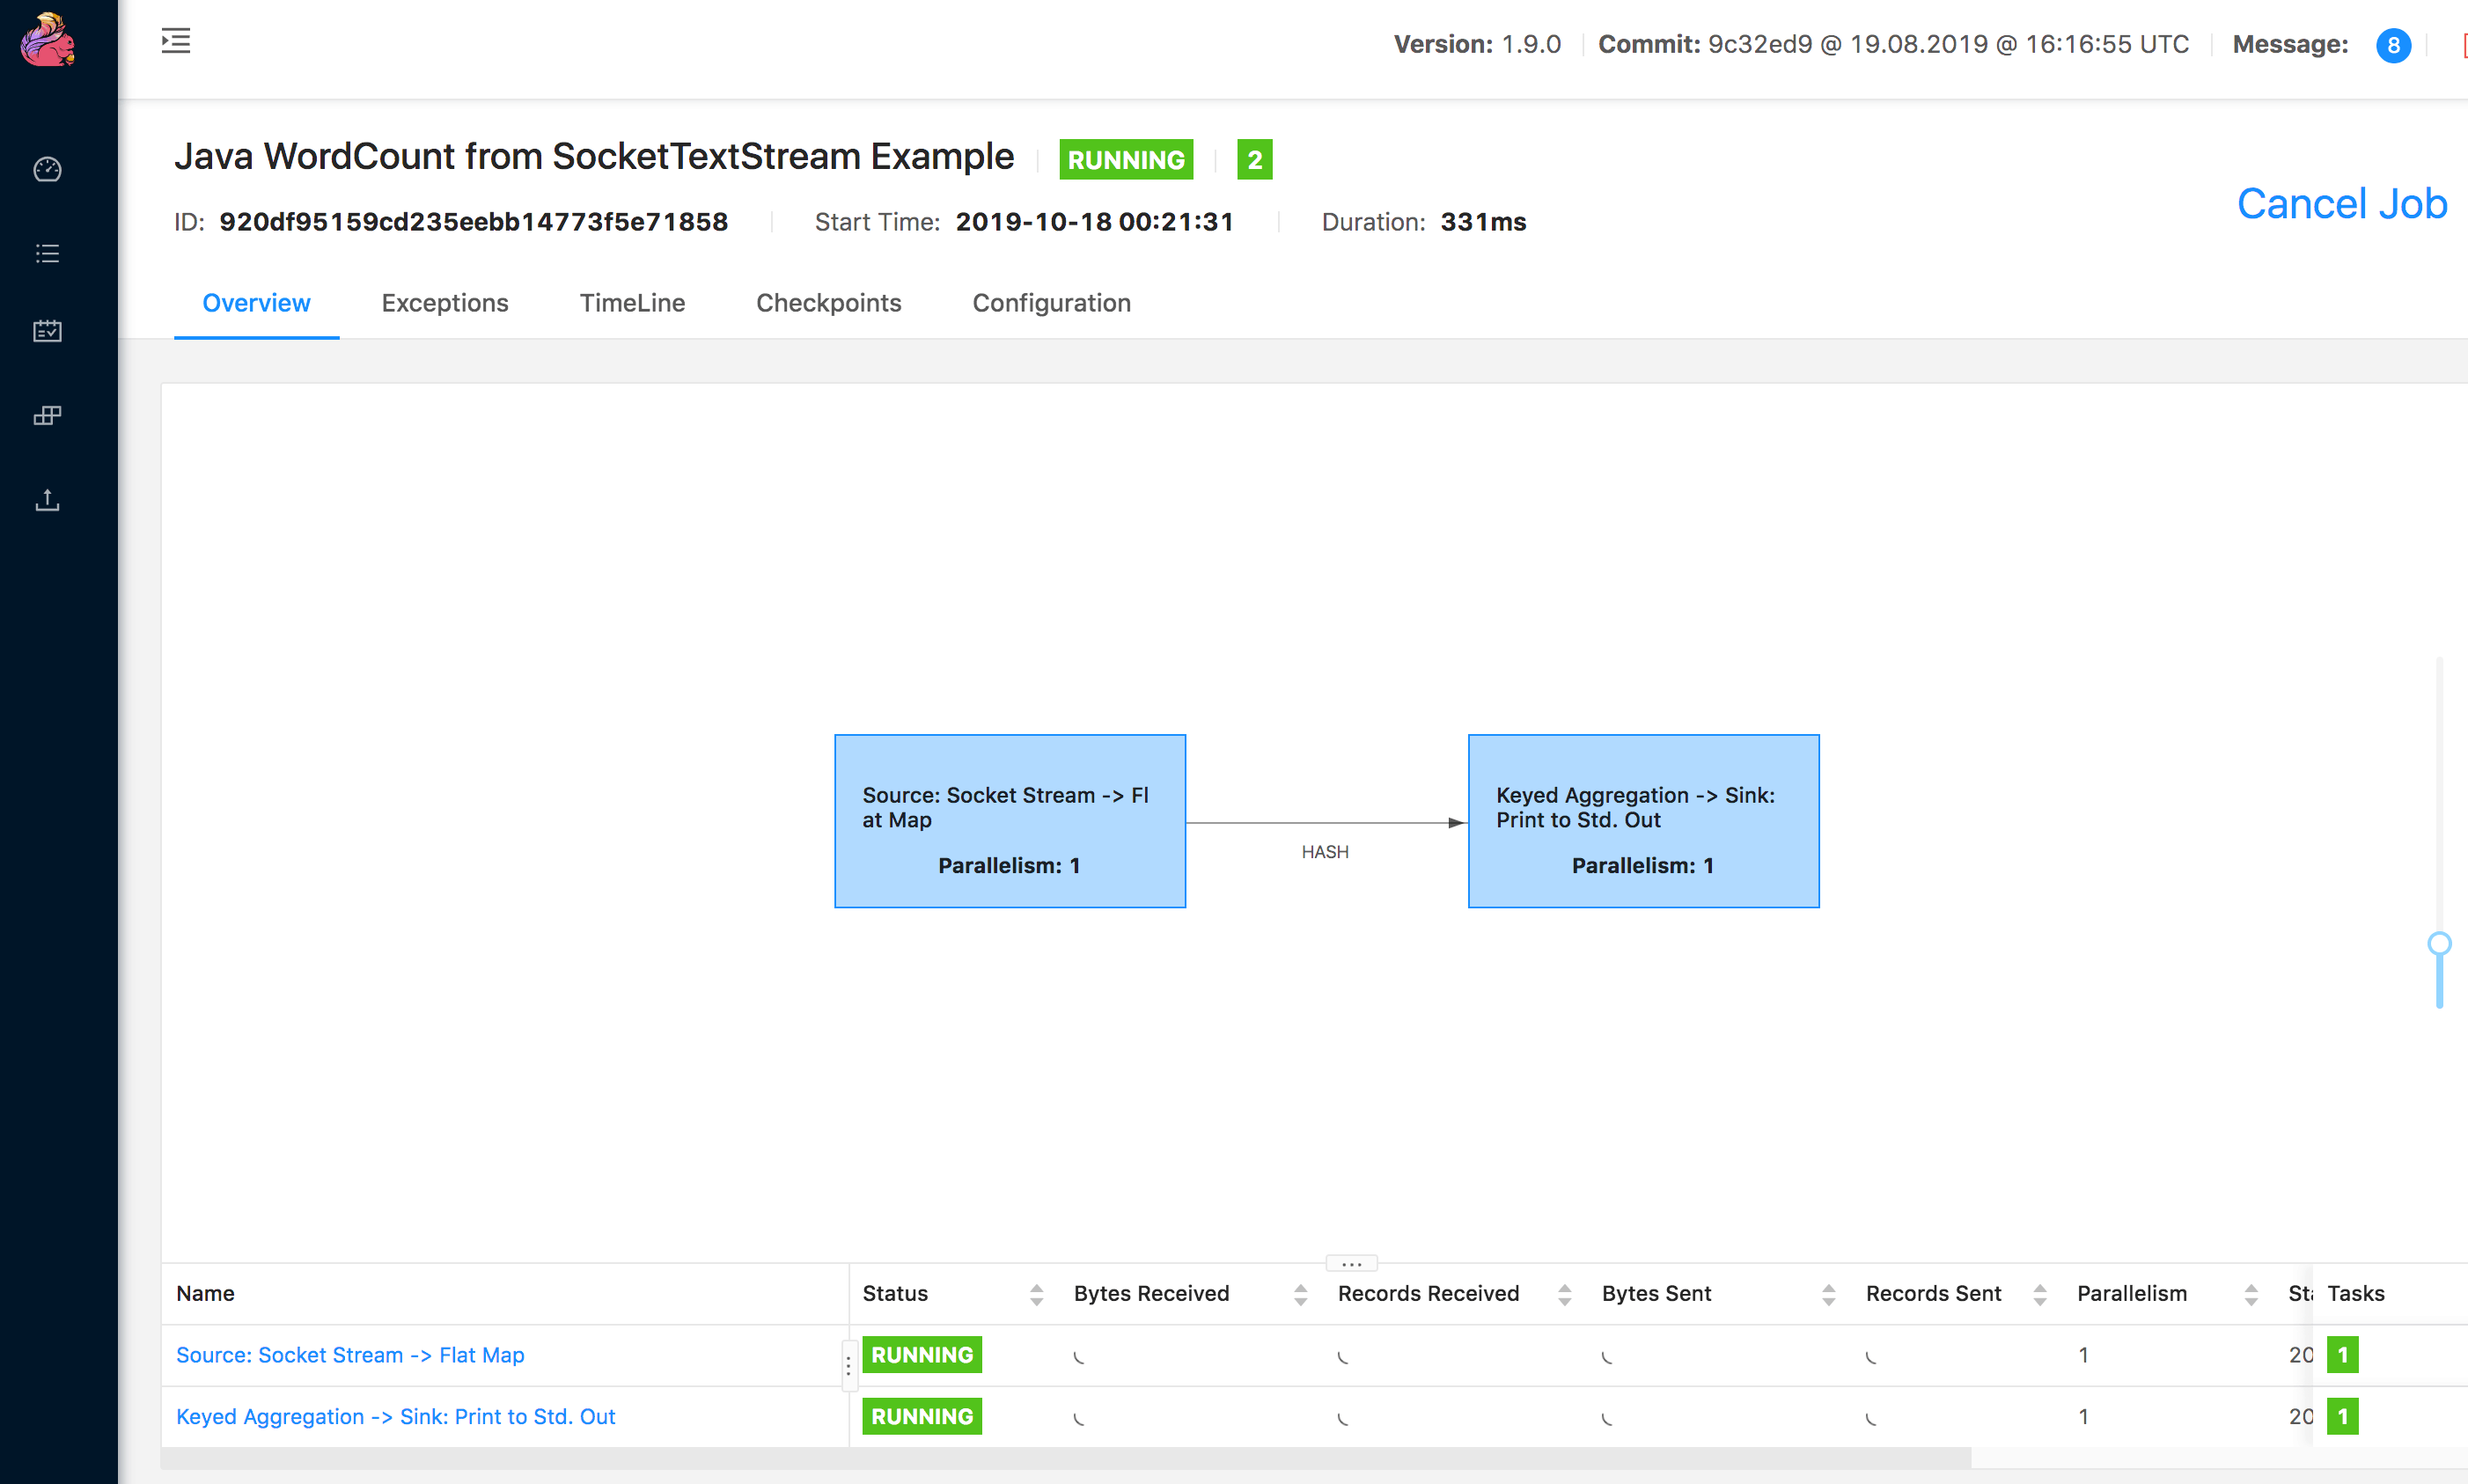
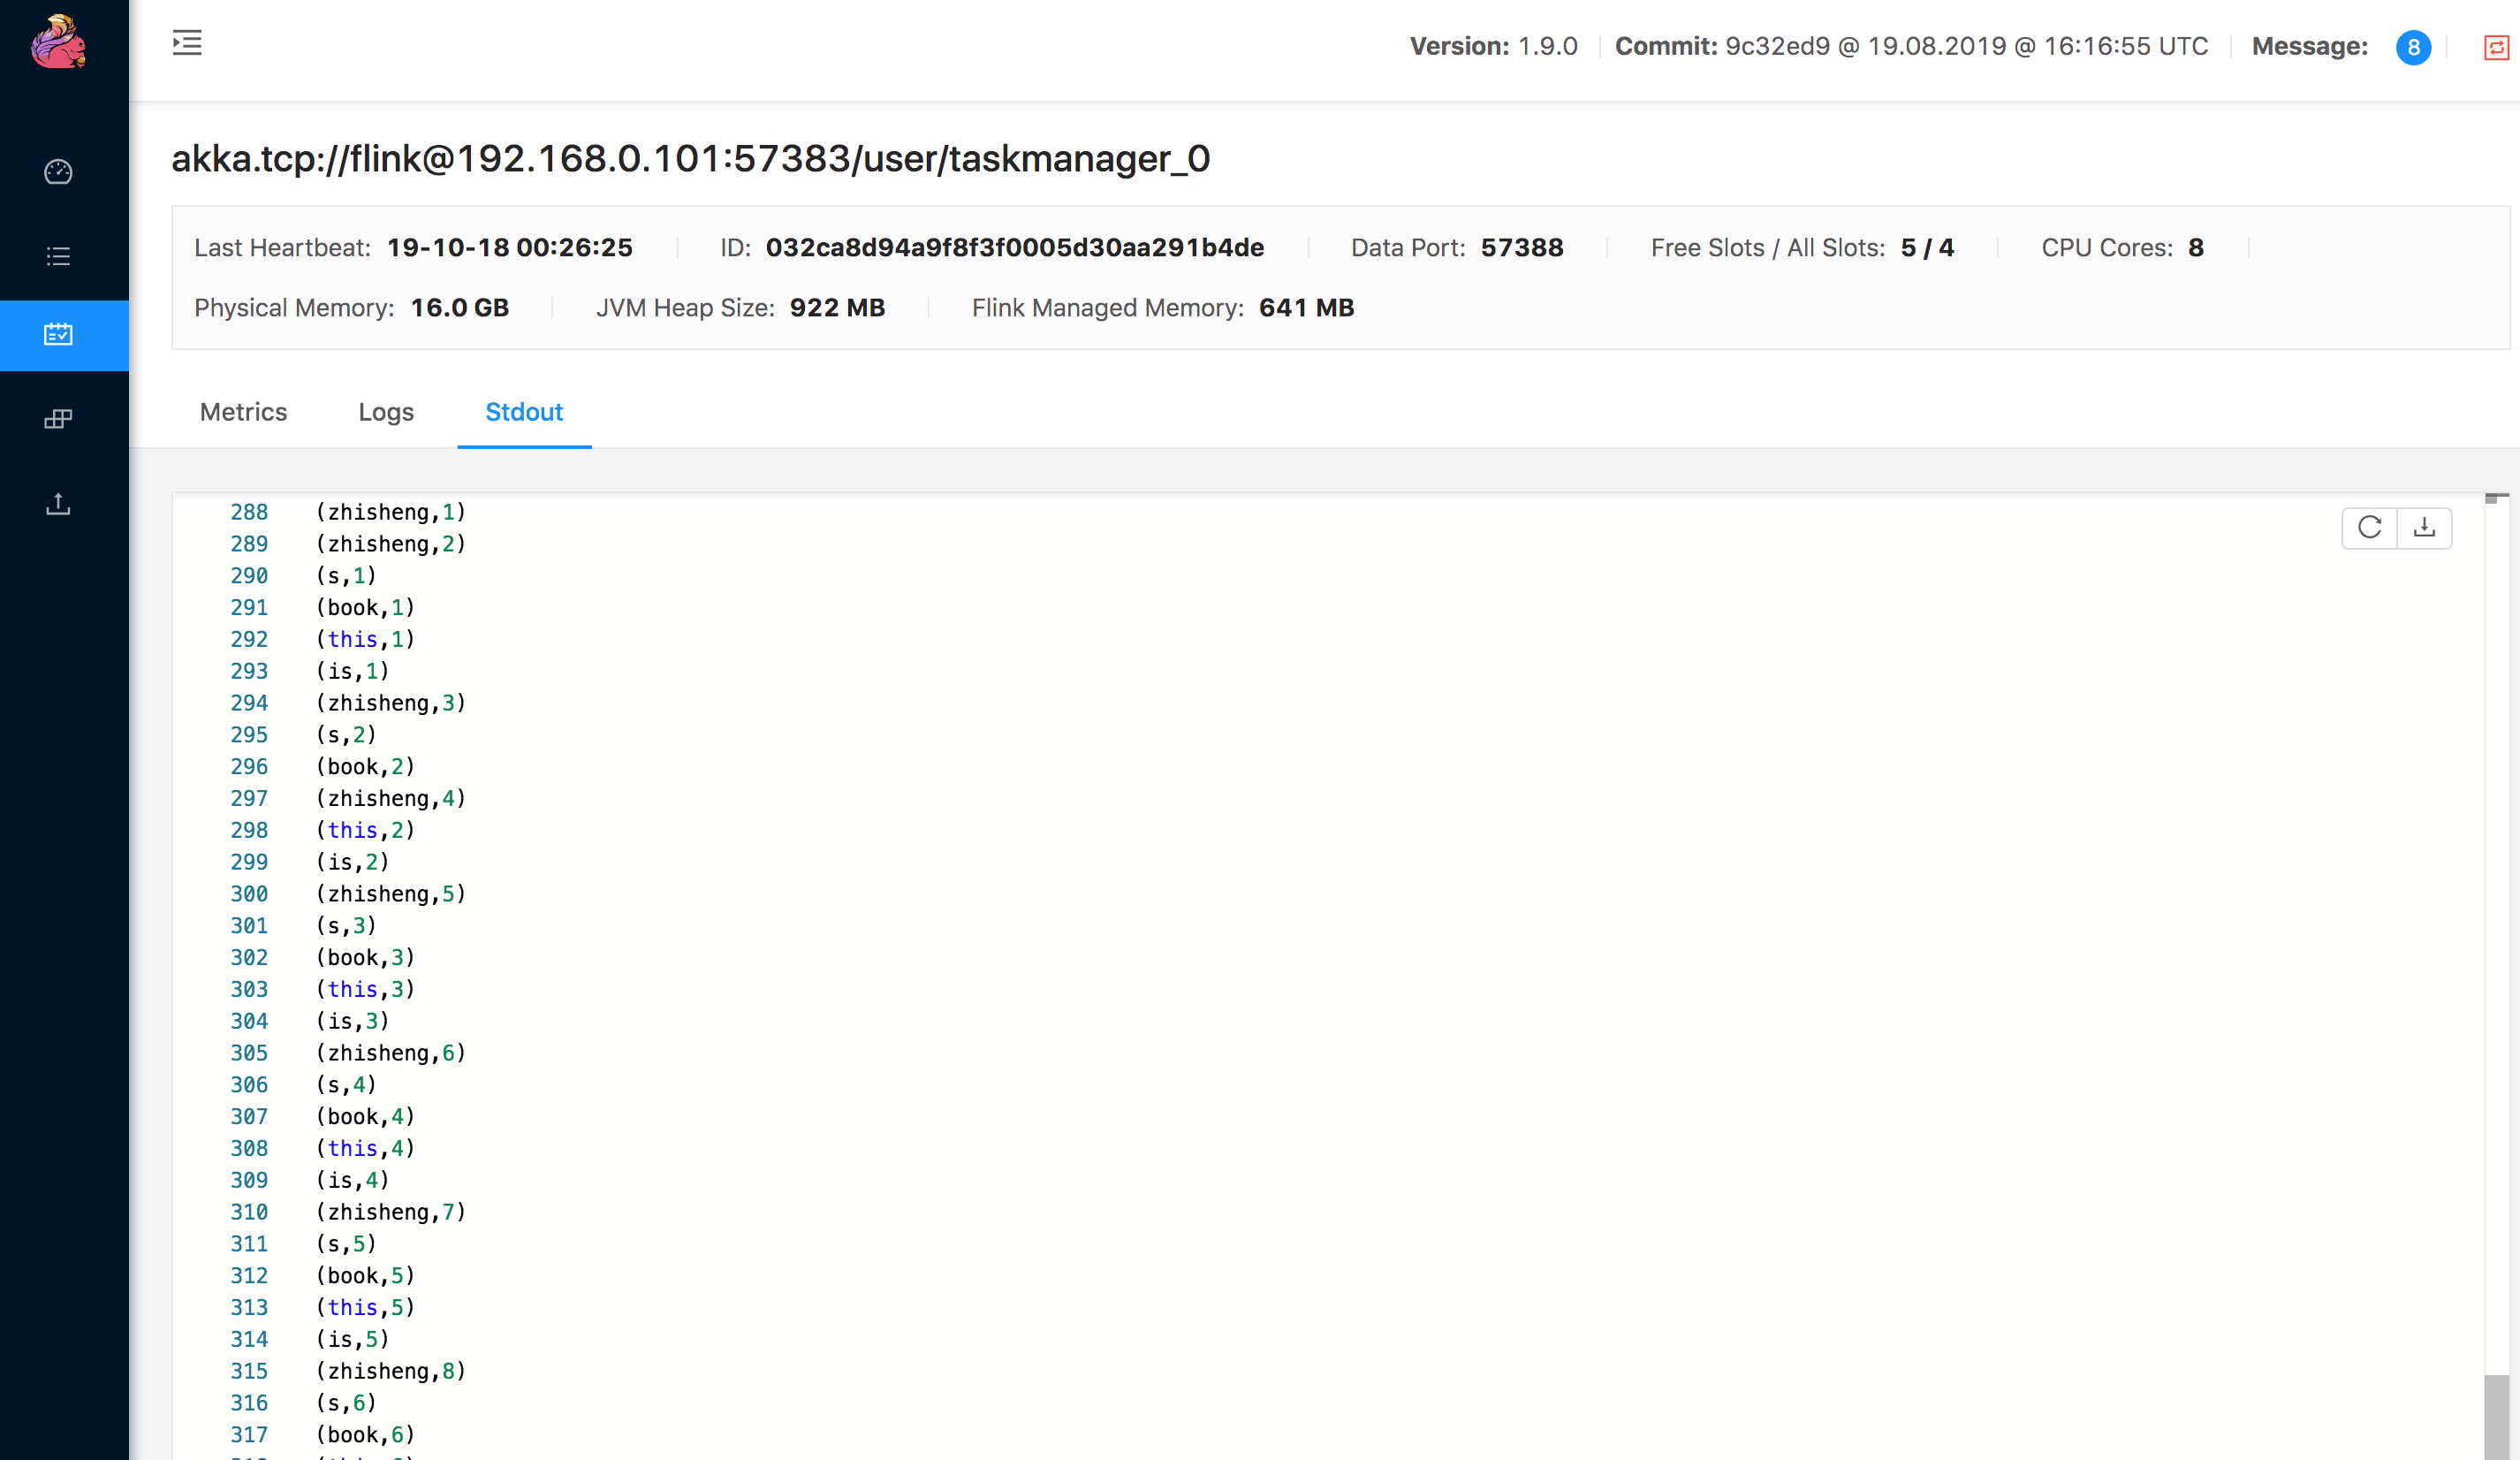
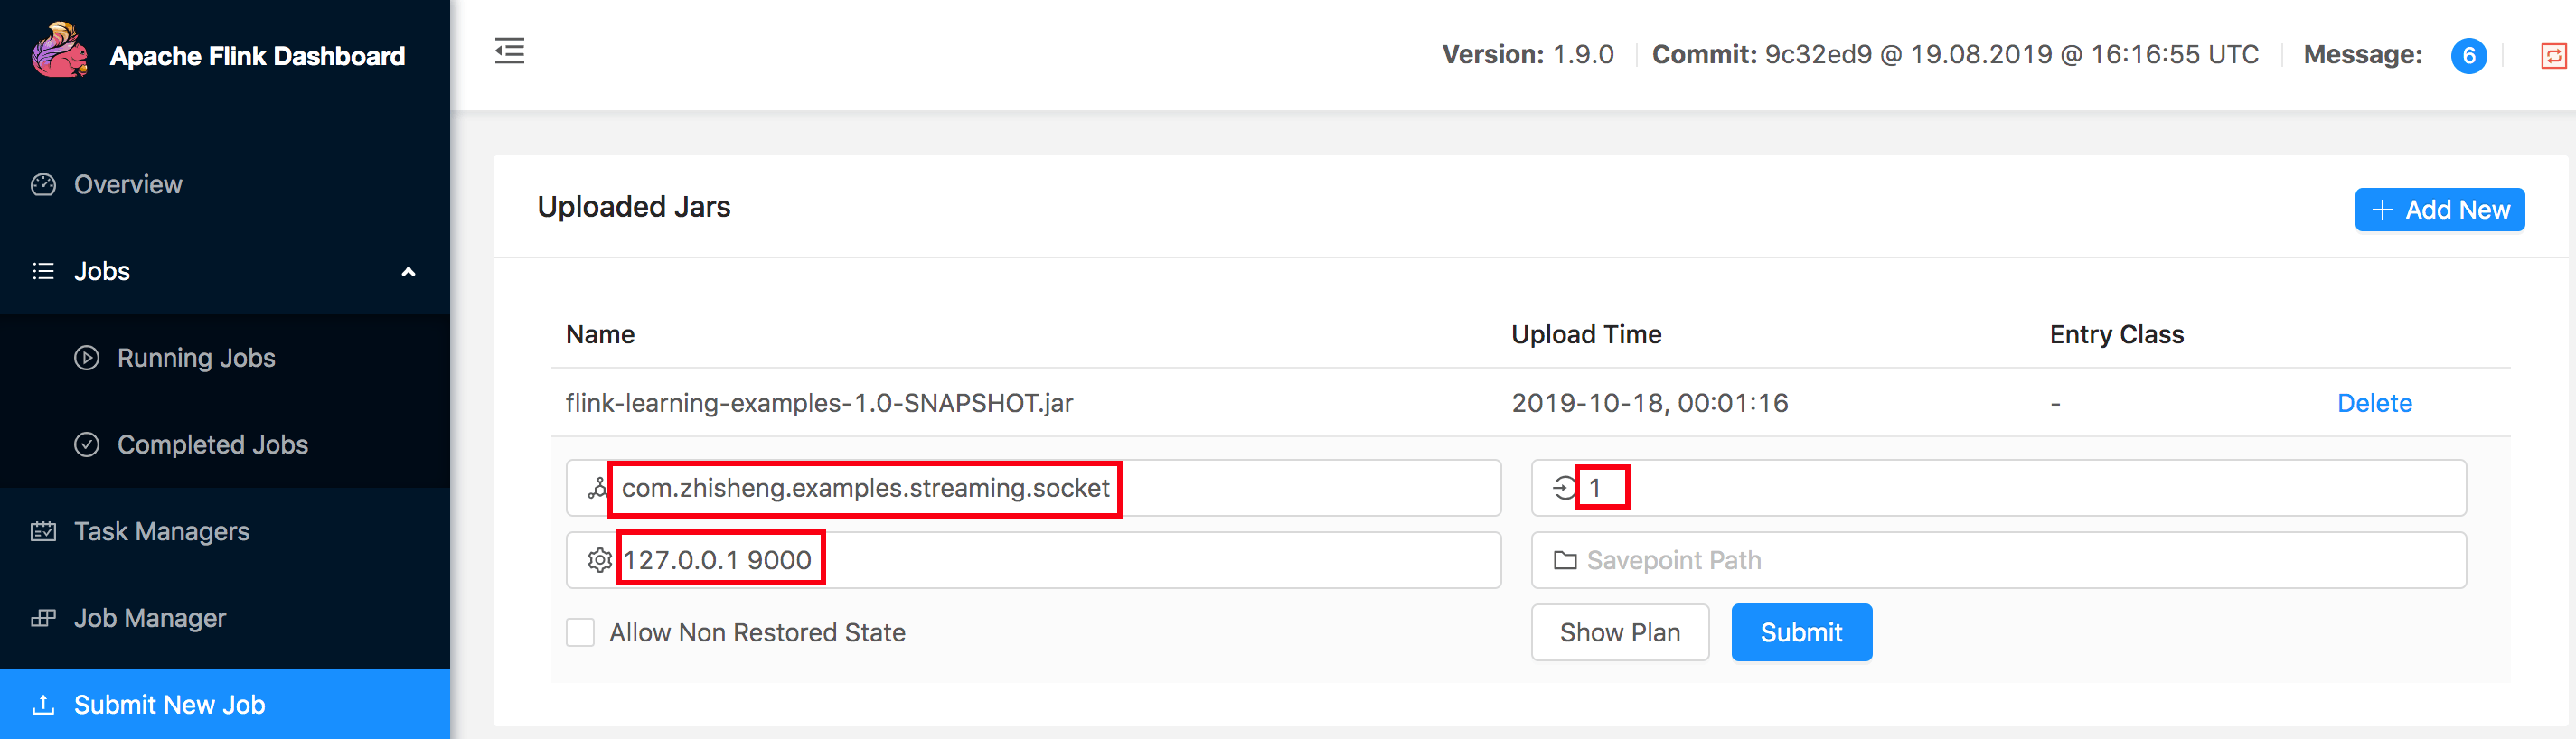 UI 的运行详情如下图:
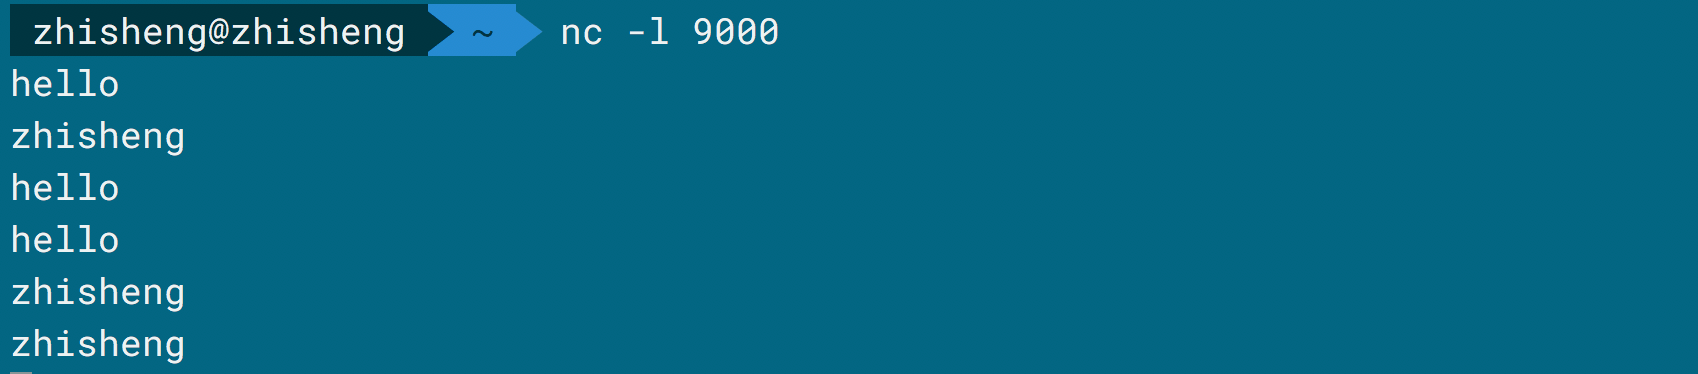
 我在终端一个个输入下面的字符串:
zhisheng@zhisheng ~ nc -l 9000
zhisheng
zhisheng's Book
This is zhisheng's Book
zhisheng
This is zhisheng's Book
This is zhisheng's Book
This is zhisheng's Book
This is zhisheng's Book
This is zhisheng's Book
This is zhisheng's Book
zhisheng
查看 Task Manager 的 Stdout 可以查看到输出:
# Flink Socket 应用程序代码分析
1、参数检查,需要传入两个参数(hostname 和 port),符合条件就赋值给 hostname 和 port
if (args.length != 2) {
System.err.println("USAGE:\nSocketTextStreamWordCount
String hostname = args[0];
Integer port = Integer.parseInt(args[1]);
2、创建好 StreamExecutionEnvironment(流程序的运行环境)
StreamExecutionEnvironment env = StreamExecutionEnvironment.getExecutionEnvironment();
3、构建数据源,获取 Socket 数据
DataStreamSource
4、对 Socket 数据字符串分隔后收集在根据 word 分组后计数
SingleOutputStreamOperator<Tuple2<String, Integer>> sum = stream.flatMap(new LineSplitter())
        .keyBy(0)
        .sum(1);

//将字符串进行分隔然后收集,组装后的数据格式是 (word、1),1 代表 word 出现的次数为 1
public static final class LineSplitter implements FlatMapFunction<String, Tuple2<String, Integer>> {
    @Override
    public void flatMap(String s, Collector<Tuple2<String, Integer>> collector) {
        String[] tokens = s.toLowerCase().split("\\W+");

        for (String token: tokens) {
            if (token.length() > 0) {
                collector.collect(new Tuple2<String, Integer>(token, 1));
            }
        }
    }
}
5、打印所有的数据流,格式是 (word,count),count 代表 word 出现的次数
sum.print();
6、开始执行 Job
env.execute("Java WordCount from SocketText");
# Flink 中使用 Lambda 表达式
因为 Lambda 表达式看起来简洁,所以有时候也是希望在这些 Flink 作业中也可以使用上它,虽然 Flink 中是支持 Lambda,但是个人感觉不太友好。比如上面的应用程序如果将 LineSplitter 该类之间用 Lambda 表达式完成的话则要像下面这样写:
stream.flatMap((s, collector) -> {
    for (String token : s.toLowerCase().split("\\W+")) {
        if (token.length() > 0) {
            collector.collect(new Tuple2<String, Integer>(token, 1));
        }
    }
})
        .keyBy(0)
        .sum(1)
        .print();
但是这样写完后,运行作业报错如下:
Exception in thread "main" org.apache.flink.api.common.functions.InvalidTypesException: The return type of function 'main(LambdaMain.java:34)' could not be determined automatically, due to type erasure. You can give type information hints by using the returns(...) method on the result of the transformation call, or by letting your function implement the 'ResultTypeQueryable' interface.
at org.apache.flink.api.dag.Transformation.getOutputType(Transformation.java:417)
at org.apache.flink.streaming.api.datastream.DataStream.getType(DataStream.java:175)
at org.apache.flink.streaming.api.datastream.DataStream.keyBy(DataStream.java:318)
at com.zhisheng.examples.streaming.socket.LambdaMain.main(LambdaMain.java:41)
Caused by: org.apache.flink.api.common.functions.InvalidTypesException: The generic type parameters of 'Collector' are missing. In many cases lambda methods don't provide enough information for automatic type extraction when Java generics are involved. An easy workaround is to use an (anonymous) class instead that implements the 'org.apache.flink.api.common.functions.FlatMapFunction' interface. Otherwise the type has to be specified explicitly using type information.
at org.apache.flink.api.java.typeutils.TypeExtractionUtils.validateLambdaType(TypeExtractionUtils.java:350)
at org.apache.flink.api.java.typeutils.TypeExtractionUtils.extractTypeFromLambda(TypeExtractionUtils.java:176)
at org.apache.flink.api.java.typeutils.TypeExtractor.getUnaryOperatorReturnType(TypeExtractor.java:571)
at org.apache.flink.api.java.typeutils.TypeExtractor.getFlatMapReturnTypes(TypeExtractor.java:196)
at org.apache.flink.streaming.api.datastream.DataStream.flatMap(DataStream.java:611)
at com.zhisheng.examples.streaming.socket.LambdaMain.main(LambdaMain.java:34)
根据上面的报错信息其实可以知道要怎么解决了,该错误是因为 Flink 在用户自定义的函数中会使用泛型来创建 serializer,当使用匿名函数时,类型信息会被保留。但 Lambda 表达式并不是匿名函数,所以 javac 编译的时候并不会把泛型保存到 class 文件里。
解决方法:使用 Flink 提供的 returns 方法来指定 flatMap 的返回类型
//使用 TupleTypeInfo 来指定 Tuple 的参数类型
.returns((TypeInformation) TupleTypeInfo.getBasicTupleTypeInfo(String.class, Integer.class))
在 flatMap 后面加上上面这个 returns 就行了,但是如果算子多了的话,每个都去加一个 returns,其实会很痛苦的,所以通常使用匿名函数或者自定义函数居多。
# 小结与反思
本节讲了 Flink 的第二个应用程序 —— 读取 Socket 数据,希望通过两个简单的程序可以让你对 Flink 有个简单的认识,然后讲解了下 Flink 应用程序中使用 Lambda 表达式的问题。
本节涉及的代码地址:https://github.com/zhisheng17/flink-learning/tree/master/flink- learning-examples/src/main/java/com/zhisheng/examples/streaming/socket